Amazon Prime Video has a vast array of shows and movies to explore. However, sometimes, you may not want certain titles to appear in your watch history or influence your recommendations. Whether it's for privacy reasons or simply decluttering, you might wonder how to remove a particular title or clear your entire watch history.
Here's a comprehensive step-by-step guide to help you through the process. While I cannot provide actual images within this text, I'll illustrate the steps using descriptive placeholders to guide you.
Step 1: Open Amazon in a Browser
Open your preferred browser and navigate to Amazon's official website.
https://www.primevideo.com/
Step 2: Log In To Your Amazon Account
Click on the ‘Sign In’ button, usually found at the top right corner of the screen. Enter your email (or phone for mobile accounts) and password.
Step 3: Click on "Account and Settings"
Once logged in, navigate to the top right corner again and hover over your profile avatar. This will reveal the dropdown menu where you can click on ‘Accounts & Settings’.
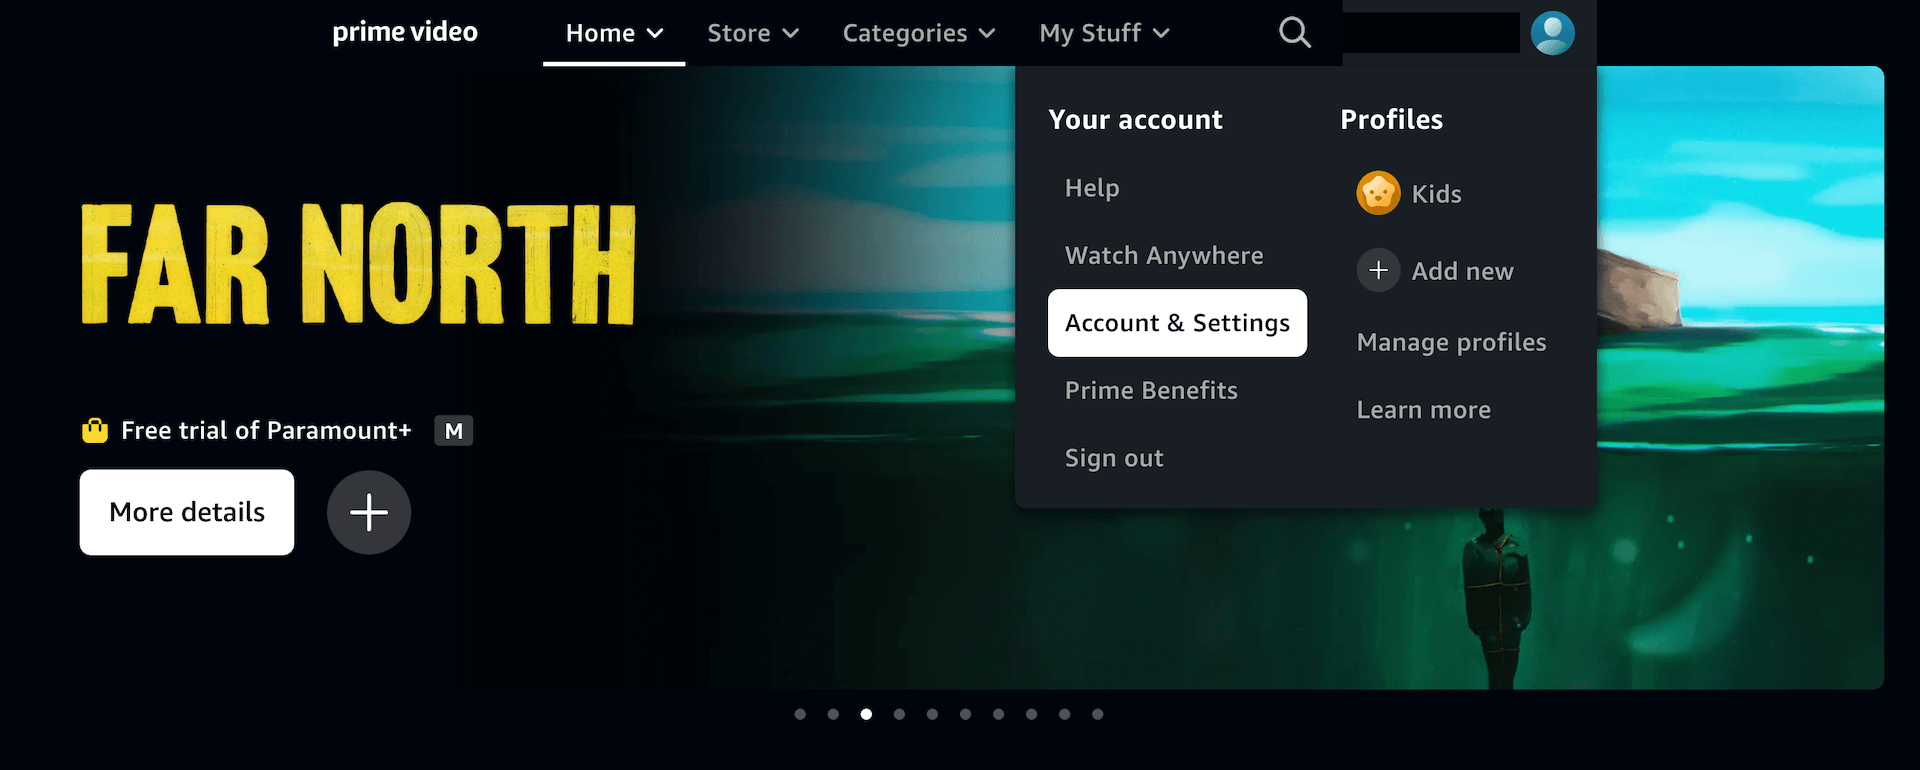
Step 4: Click on the 'Watch History' tab
Once you have accessed your Amazon Prime Settings, find and click on the 'Watch History' tab option. At the time of writing, it is the 9th tab from the left.
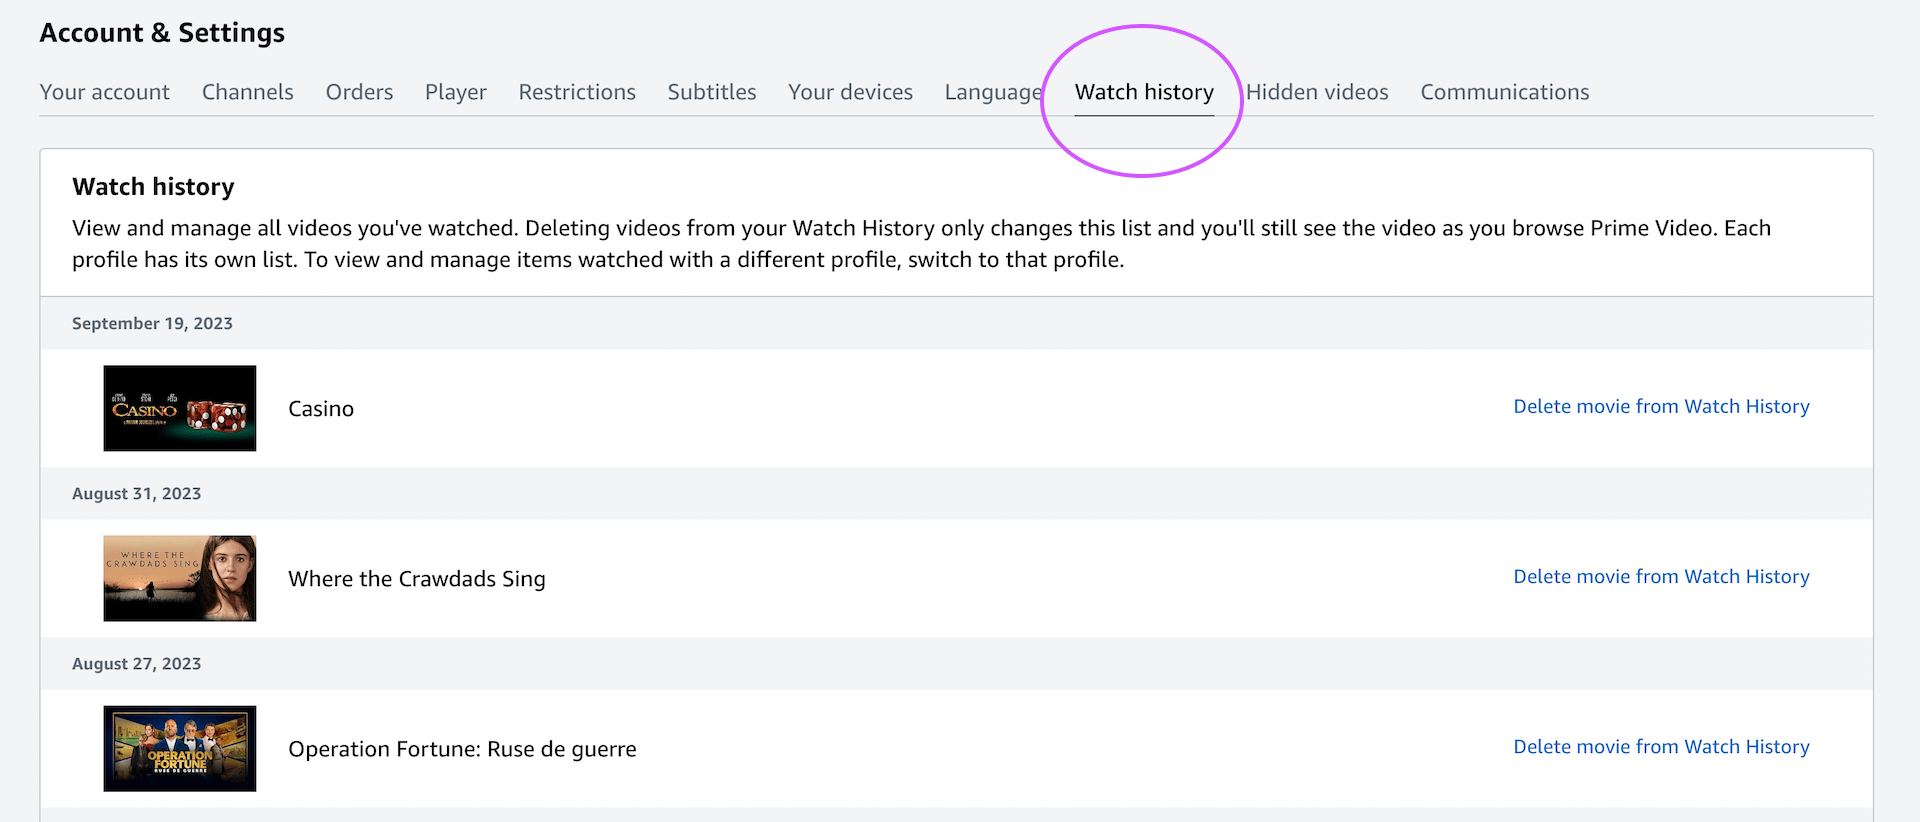
Step 5: View Your Watch History
Clicking the ‘Watch History’ link will display a list of all the shows and movies you've watched on Amazon Prime Video. Here, you can review everything you've streamed.
Step 6: Locate the ‘Remove’ or 'Delete' Option
Beside each title in your watch history, there should be an option to remove or delete that particular item. This option might appear as a button, an ‘X’ icon, or a trash bin icon.
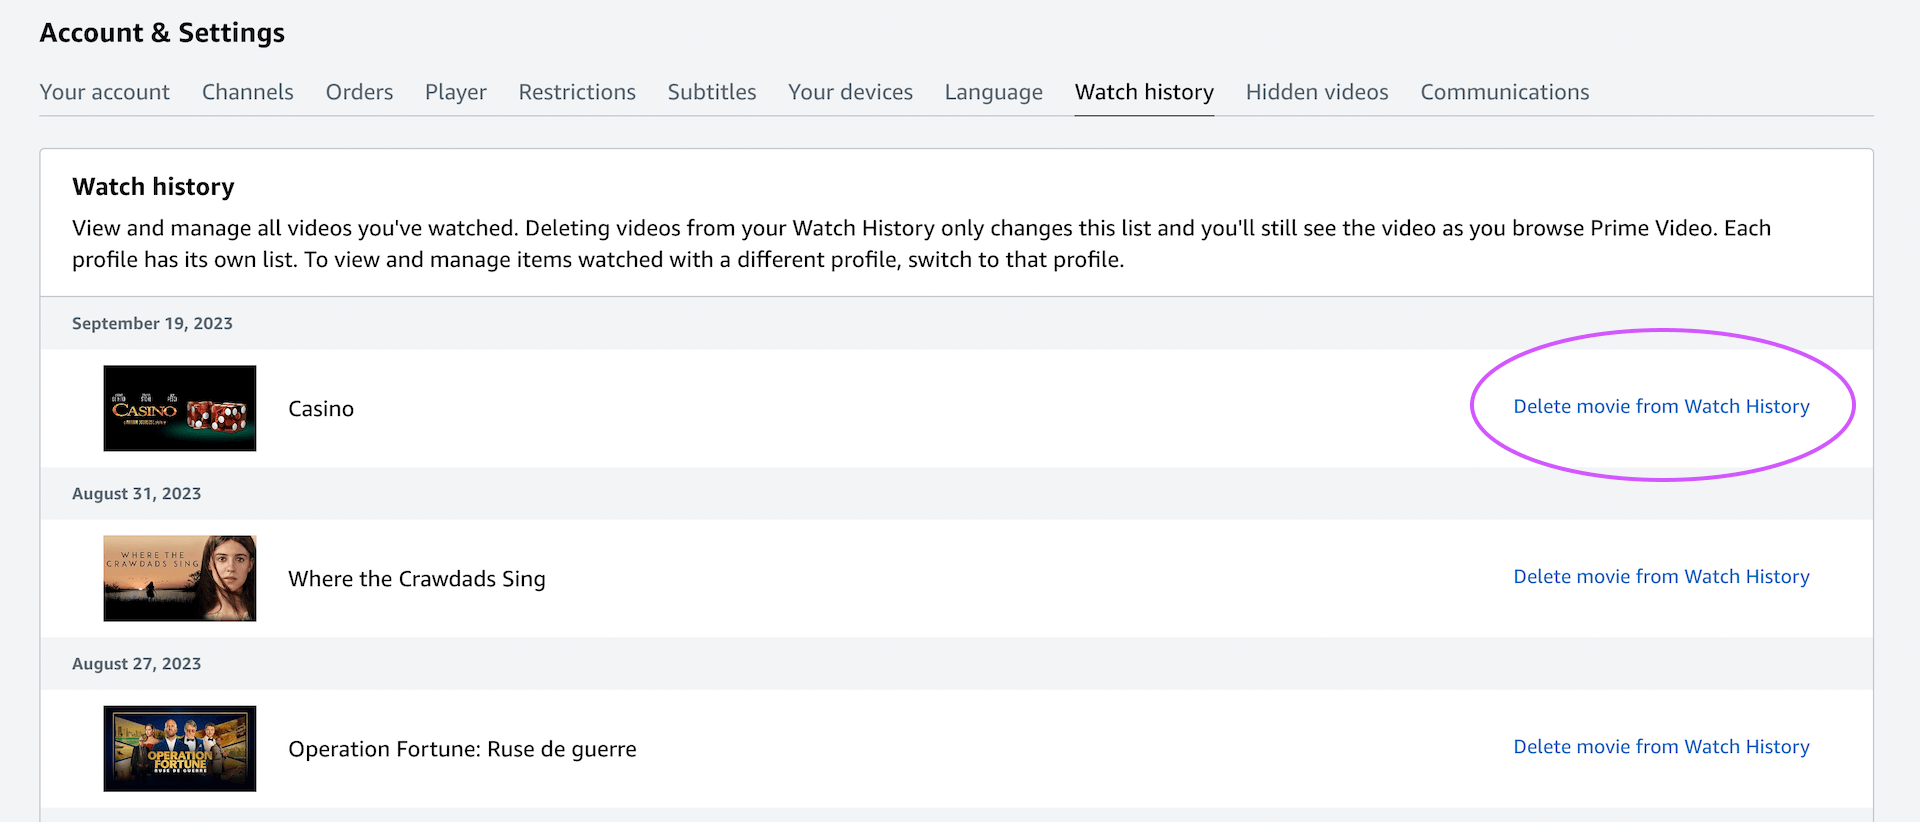
Step 7: Delete Individual Titles
To delete a specific title from your watch history, simply click on the ‘Remove’ or 'Delete' option next to it. Confirm any prompts that appear. The title will then be removed from your watch history.
Note: Remember to only delete the titles that you wish to NOT affect your recommendations. It's usually best to keep the titles that you enjoyed, so that you can get further accurate recommendations.
Step 8: Option to Clear Entire Watch History (if available)
Some users might have an option to clear their entire watch history at once. If available, this option will typically be located at the top or bottom of the watch history list. Clicking it will prompt a confirmation box to ensure you want to delete everything.
Step 9: Check Your Recommendations
After clearing your watch history, you might notice a change in the recommendations provided by Amazon Prime Video. The system uses your watch history to suggest content, so removing titles can alter these suggestions.
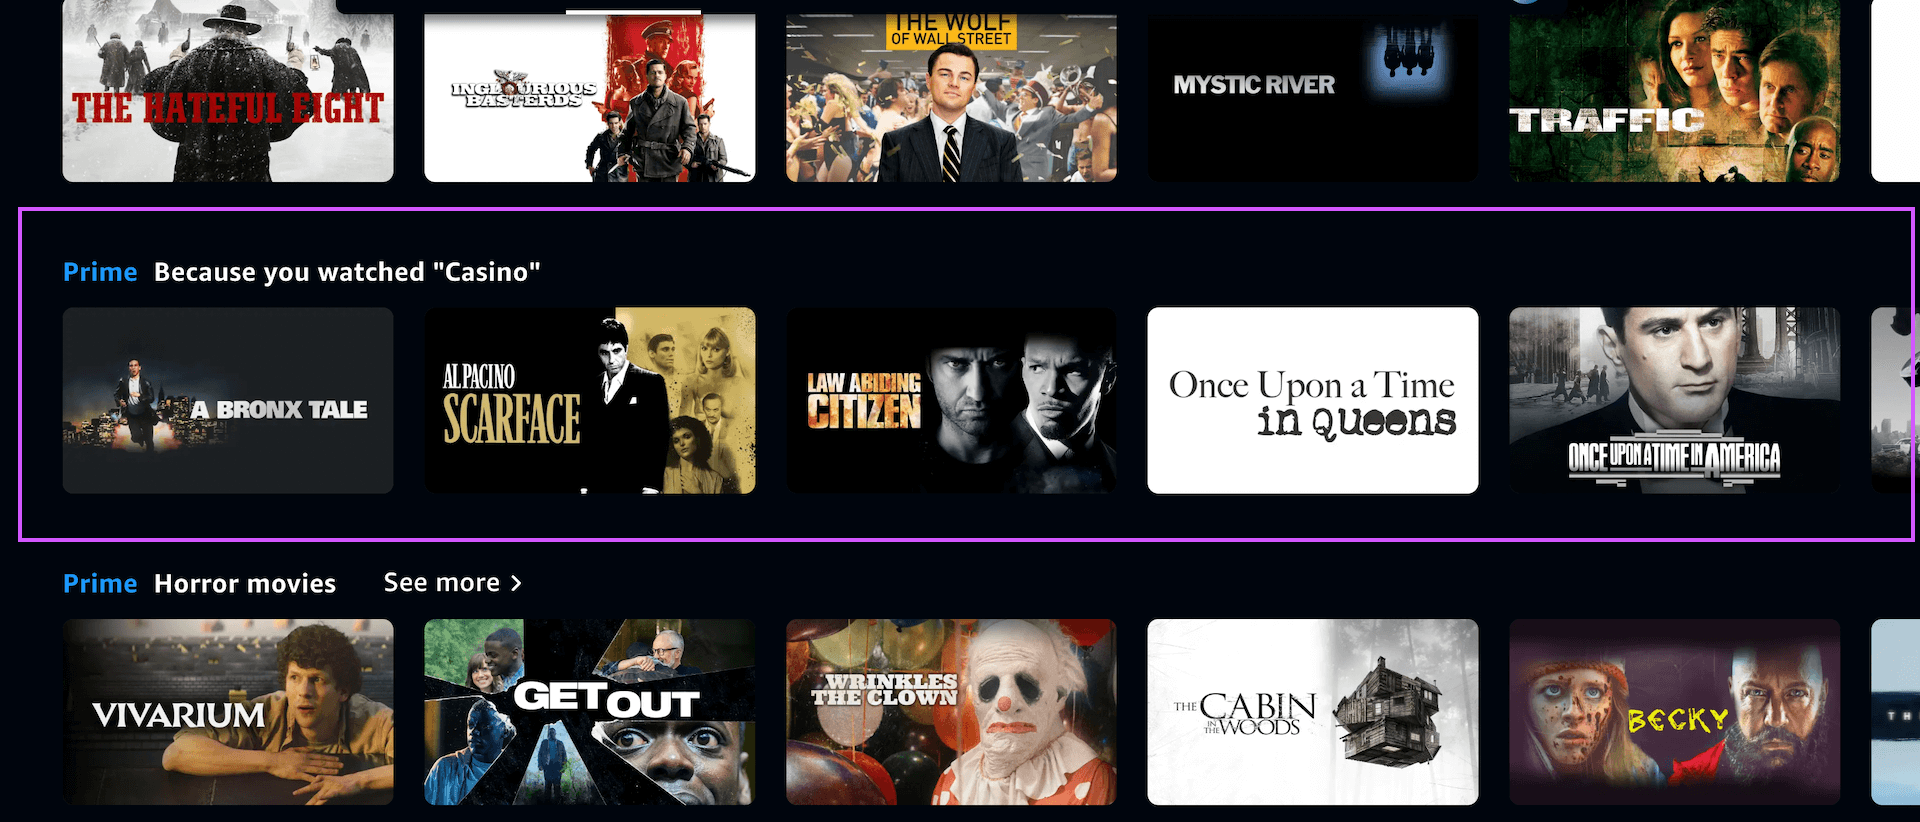
On the home page look for sections titled like:
- Because you watched 'Casino'
- TV Shows we think you'll like
- Recommended movies
These sections should now have been adjusted or removed, based on your recently cleared Amazon Prime Watch history.
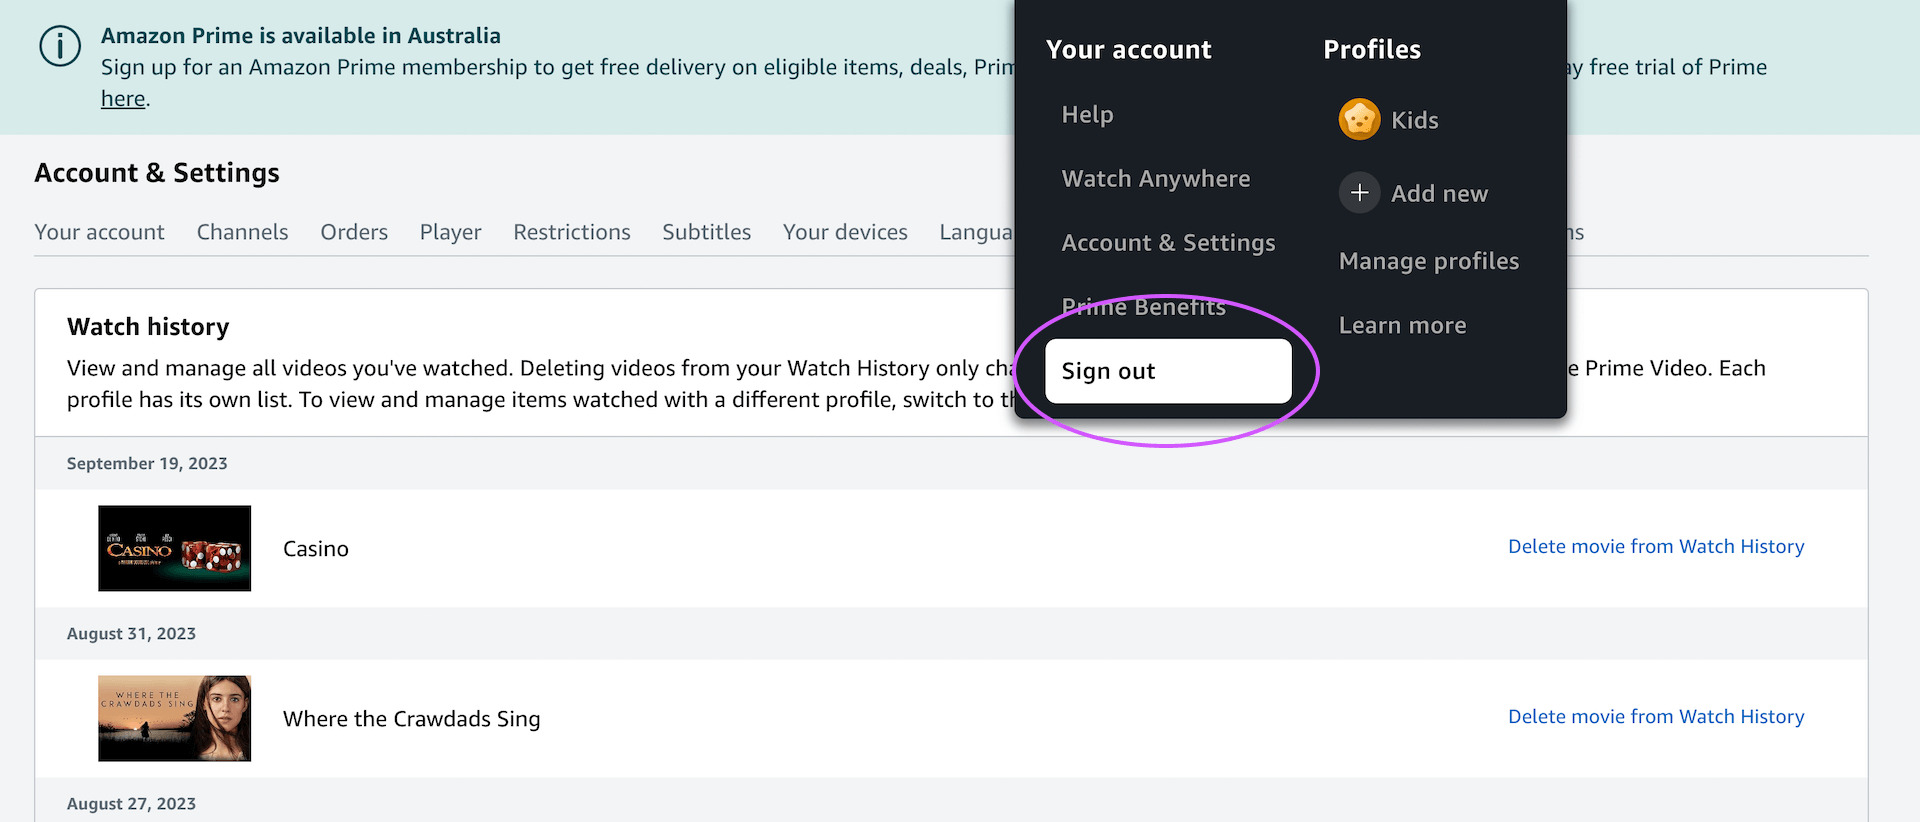
Step 10: Log Out for Extra Security
Once you're done managing your watch history, it's a good practice to log out of your account, especially if you're on a shared or public computer.
Managing your Amazon Prime Video watch history is straightforward. With these steps, you can have better control over your viewing records and ensure that your recommendations align more closely with your preferences. Remember always to exercise caution when sharing or accessing your accounts on shared devices to protect your privacy.
